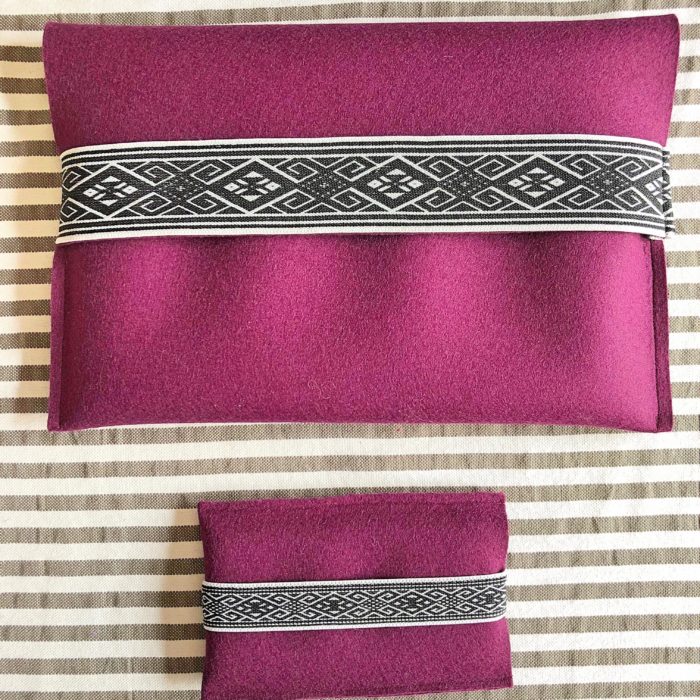
Lately I just bought a new laptop. Constantly moving back and forth, a good protection sleeve is highly recommended!
Considering all the overboarding drawers and boxes full of all kind of haberdashery – I really should put my hands on it and use my supplies;-) So here it comes – Laptop & Mobile accessory DIY ~ simply stylish!
Laptop & Mobile accessory DIY ~ simply stylish!
And to anticipate your question – it is not difficult at all. However, you need a sewing machine.
For the Laptop sleeve you need:
Felt in the coulour of your choice depending on the size of your laptop, here: 60 cm x 40 cm
Elastic band of your choice depending on the size of your laptop, here: 40 cm
Pins
Scissors
Carpet knife
1 Step
Place your laptop on the felt and sort out the size and form you want to have your sleeve in the end.
Cut out the prefered form with the carpet knife. Don`t forget to leave at least 3 – 4 cm on the sidelines, depending on the height of your laptop.
2 Step
Fold the felt around the laptop. The bottom line of the felt should just reach the upper line of the laptop. Fix the two edges with pins. Now you have a sort of pochette and you can sew the edges with the sewing machine.
3 Step
Fix the elastic band on top of the flap without streching it. The end of the elastic band is turned on the bag of the upper flap.
Sew the lower and the upper side of the elastic band evenly on the flap.
4 Step
After that, put your laptop in the sleeve, close the pochette and pull the second half of the elastic band (which is still hanging loose) around the bag, towards the other end of the elastic band. Check out how much you want it to be stretched in order to be tight around the laptop.
Fix the loosen end above the other end of the elastic band with some pins and remove the laptop.
5 Step
Now you can turn the end and sew it on the flap.
Finally your own individual and stylish new laptop accessory is ready!
Hurray! I`ld loved to see some pictures of your own creations!!
And for the sewing passionates, I have another DIY for a new mobile accessory. I had some leftovers from the felt, so I continued my „creative hour“…
For the mobile accessory you need:
Felt in the coulour of your choice depending on the size of your mobile, here: 34,5 cm x 12cm
Elastic band of your choice depending on the size of your mobile, here: for the mobile: 28 cm
Pins
Scissors
Carpet knife
1 Step
Cut out a long rectangle, so by turning the upper half on top of your mobile, the two edges should end at the upper end of your mobile. The sidelines on the right and left should exceed about 1,5 cm the size of the mobile.
2 Step
Mark the exact middle of the rectangle and fix one end of the elastic ribbon with the sewing machine.
Make sure you also have the identic distance to the right and left!
3 Step
Now form a pochette , fix it slightly with some pins and wrap the elastic band around it (horizontal). Check out how much you want it to be stretched in order to be tight around the mobile. Fix it with a pin and remove your device. Sew it on top of the other end of your elastic band, so you only see one seam.
You now have a sort of elastic loop.
4 Step
Now fold the two ends and form a pochette. After pinning the two sides, fix them by sewing.
Ready! What do you think?! It`s quite easy, isn`t it?
My daughter Louisa did quite some of them as a Christmas present. She got a lot of „wows“ for them!!!
Hurray! I`ld loved to see some pictures of your own creations!!


