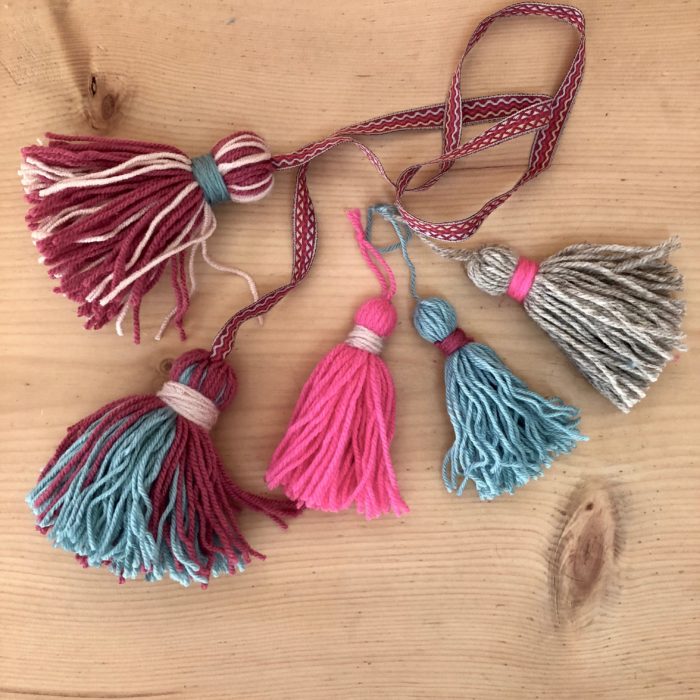
Tassels DIY – Quasten schnell und einfach

  • Follow
  • In unserer Familie wird immer schon viel gebastelt und selbstgemacht. Überall stehen große Gläser und Schachteln mit Knöpfen, Bändern, Perlen, Stoffen und mehr. Wir basteln auch immer Weihnachts- und Geburtstagsgeschenke selber.

    Deshalb möchte ich euch heute zeigen wie ihr Quasten selber machen könnt. Wir haben sie an einigen Vorhängen sowie auch an Lampen hängen. Meine Mami trägt auch eine an einer Handtasche ;-).

    DIY Quasten Tassels Beispiele

    Für eine selbstgebastelte Quaste (mit oder ohne Kordel/Baumwollband) benötigst du:

    – Wolle (verschiedenen Farben, falls gewünscht)
    – eine Schere
    – ein Stück Pappe (doppelte Länge wie fertige Quaste)
    – eine bunte Kordel oder ein buntes Baumwollband

    1.Schritt

    Schneide die Pappe unten rechts und oben links etwas ein.

    Stecke den Anfang deiner Wollschnur in den unteren, rechten Schlitz und wickle die Wolle um die Pappe herum.
    (Falls du eine zweifarbige Quaste haben willst, kannst du das Ende der einen Schnur mit dem Anfang der zweiten Farbe verknoten – siehe Bild)

    2.Schritt

    Je nach gewünschter Dicke deiner Quaste kannst du das Ende der Wollschnur in den zweiten Schnitt oben links in der Pappe feststecken.

    Dann entfernst du vorsichtig die Pappe.

    3.Schritt

    Mache einen Knoten in das Ende deiner Kordel/deines Bandes.

    Stecke es etwas unterhalb der Mitte in die Wollfäden und verknote alle Fäden oberhalb dieses Knotens mit einem Faden (ca.30 cm).

    4.Schritt

    Jetzt schneide die noch verbundenen Enden oben und unten der aufgewickelten Schnur durch.

    Verteile die Fäden des oberen Bündels strahlenförmig um die Kordel/Schnur.

    5.Schritt

    Nimm ein Faden in der Farbe deiner Wahl und schneide ca. 40 cm ab.

    6.Schritt

    Lege mit deinen Faden eine Schlaufe am oberen Rand der Quaste, und wickle um diese herum.
    (Du musst am Anfang die Schlaufe mit dem Daumen festhalten).

    7.Schritt

    Am Ende ziehst du das Ende des Fadens von oben durch die Schlaufe und ziehst an beiden Enden. Dann kannst du die überstehenden Enden abschneiden.

    Kürze die Quaste auf die gewünschte Länge.

    Am anderen Ende der Schnur musst du das Gleiche machen.

    Jetzt hast du eine selbstgemachte schöne Verzierung für einen Vorhang, eine Stehlampe oder eine Tasche oder…!

    Ich wünsche Euch viel Spaß beim Nachmachen!

    Schön wäre es, wenn ihr mir ein paar Fotos von Euren fertigen Quasten sendet 😉

    In our family we love decorating and crafting! Many birthday and christmas presents are handmade and we have a huge supply of haberdasheries in boxes, glasses and drawers.

    So today I want to show you how to make your own tassels. We decorate curtains and lamps with them. My mum even wears one of her handbag!

    To make a tassel you need the following:
    – wool (different color if desired)
    – scissors
    – a piece of cardboard (double the length of your desired tassel)
    – piece of cord or cotton ribbon (approx. 1 m)

    1. Step
    Incise the card board on the lower right side and the upper left side.

    Put the woolen thread in the lower right incision and start wraping it up around the card board.(In case you like a second colour, you can knot together the two threads in upper end of the card board.)

    2. Step
    If your tassel has the desired volume, you can put the woolen thread in the upper left incision of the card board.Then remove the card board carefully.

    3. Step
    Make a knot in the end of your ribbon band or cord.Place it in the middle of your tassel and tie it up above this knot with a thread of about 30cm. (Make sure you leave the lower end a little bit longer.)

    4. Step
    Now cut through the ends on the upper and lower side.
    Spread the threads radially around the ribbon band or cord.

    5. Step
    Choose a thread in the colour of your choice and cut ca. 40 cm.

    6. Step
    Make a loop at the upper side of the tassel and start wrapping around the thread (hold the loop tight in the beginning).

    7. Step
    Then put the end of the thread from top to bottom through the loop and pull both ends. You can cut the ends.
    Straighten the end of the tassel.

    Repeat these staps for a second tassel – and here you go with a handmade and pretty decoration for curtains, lamps, bags or….!

    Have fun!
    And I am really curious to see some pictures of your tassels!



    Schreibe einen Kommentar

    Deine E-Mail-Adresse wird nicht veröffentlicht. Erforderliche Felder sind mit * markiert